

There were a few options that I found online to getting the sea glass look. My original inspiration came from this beautiful bottle that I found HERE on Pinterest.

The plan was to use an etching cream, but when I read all of the warnings of the toxicity on the package and saw the price tag which was beyond my budget, I began to think of alternative non-toxic solutions to get the look.
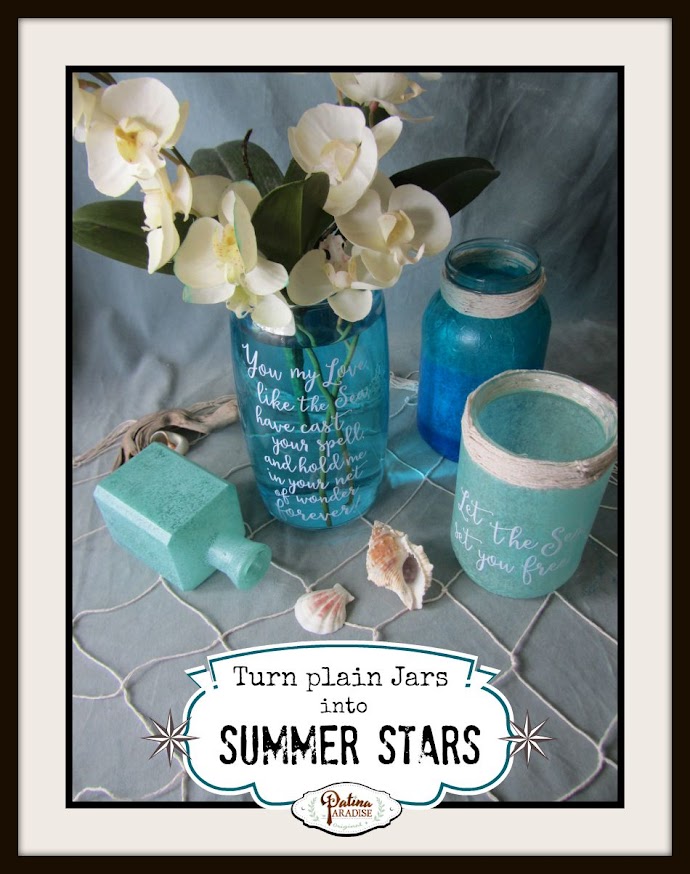
The first thing that came to mind was to use pastel coloured tissue paper and adhere it with "Mod Podge". There were some challenges with this technique, but if you have a wide mouth jar without writing on it, you will be in good shape. I found this particular jar at the thrift store. I used a piece of tissue paper that I had in my stash and found one of them was just the right shade of aqua and had some texture to make it look like the picture above.
Faux Sea Glass using Tissue Paper

FOR THIS LOOK, here is what you will need...
- widemouth glass jar
- Mod Podge in matte finish
- tissue paper in muted colour
- net, twine or rope to cover the rim of the jar with
- brush for applying Mod Podge
- hot glue and glue gun for attaching net around rim
Steps


Faux Sea Glass using Food Coloring,
Mod Podge and Paint

FOR THIS LOOK, here is what you will need...
- small glass jar or small bottle
- Mod Podge in gloss
- food colouring
- acrylic paint in a light shade of aqua
- sponge brush for applying Mod Podge
- sea sponge for applying the paint
Steps


NOTE: This technique is better suited for small glass containers, as it is more difficult to get a consistent pattern on a larger surface. Also note that the colouring is not permanent. it will come off with water. I really like how this particular technique looks on these small square vinegar bottles that I had on hand. They already had an aqua tint to them and looked the most like sea glass with the food colouring and the paint. What do you think?
Faux Colored Glass using Food Coloring

FOR THIS LOOK, here is what you will need...
- clear glass jar, bottle or vase
- food colouring
- vinyl lettering of your choice
Steps


My Silhouette Challenge buddies and I are all sharing projects on our blogs today, so peruse the projects below for a wealth of Silhouette inspiration!
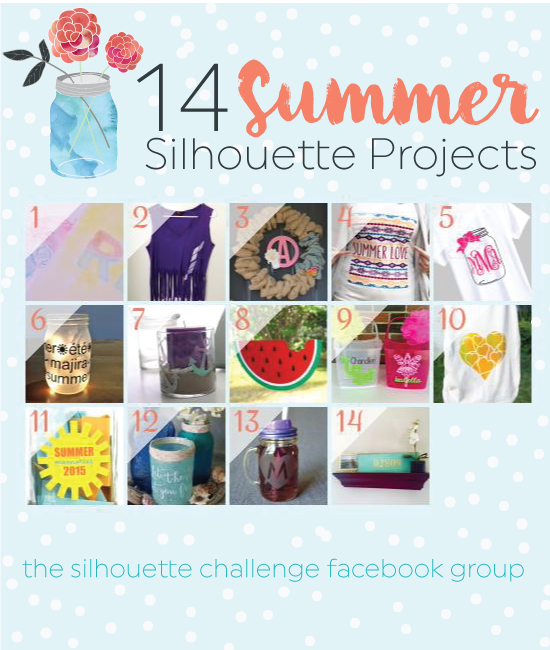
1. Home At Eight // 2. DIY Just Cuz {Sam} // 3. DailyDwelling // 4. Where The Smiles Have Been // 5. My Paper Craze // 6. Get Silvered // 7. DIYJustCuz {Brittany} // 8. Whatcha Workin' On? // 9. The Stamp Doc // 10. Practically Functional // 11. Simply Kelly Designs // 12. Patina Paradise // 13. Architecture of a Mom // 14. Weekend Craft
Blessings,
Lucy
Partying at these locations...
Your Turn to Shine @ Bless'er House
Feathered Nest Fridays @ French Country Cottage
Creativity Unleashed @ Practically Functional
Fridays Unfolded @ Nancherrow
Shabbilicous Fridays @ The Shabby Art Boutique
Frugal Friday @ The Shabby Nest
Catch as Catch Can @ My Repurposed Life
Show and Tell Friday @ My Romantic Home
A morning Cup of Joe @ The Cottage Market
Think and Make Thursdays @ Little Red Brick House
Simple and Sweet Fridays @ Rooted in Thyme
Anything Blue Friday @ The Dedicated House
Friday Features @ Oh My Heartsie Girl
Saturday Sparks @ Pieced Pastimes
Share it One More Time @ One More Time Events
Sundays at Home @ Thoughts From Alice
That DIY party @ diy showoff
Inspiration Monday @ Redhead Can Decorate
Something to Talk About @ The Altered Past
Inspire Me Monday @ My Uncommon Slice of Suburbia
The Scoop @ Stone Gable
The Inspiration Board @ Carolyns Home Work
Talented Tuesdays @ Home Remedies
Wow Us Wednesdays @ Savvy Southern Style
Friday Favorites @ Casa Watkins
Feathered Nest Fridays @ French Country Cottage
Creativity Unleashed @ Practically Functional
Fridays Unfolded @ Nancherrow
Shabbilicous Fridays @ The Shabby Art Boutique
Frugal Friday @ The Shabby Nest
Catch as Catch Can @ My Repurposed Life
Show and Tell Friday @ My Romantic Home
A morning Cup of Joe @ The Cottage Market
Think and Make Thursdays @ Little Red Brick House
Simple and Sweet Fridays @ Rooted in Thyme
Anything Blue Friday @ The Dedicated House
Friday Features @ Oh My Heartsie Girl
Saturday Sparks @ Pieced Pastimes
Share it One More Time @ One More Time EventsSundays at Home @ Thoughts From Alice
That DIY party @ diy showoff
Inspiration Monday @ Redhead Can Decorate
Something to Talk About @ The Altered Past
Inspire Me Monday @ My Uncommon Slice of Suburbia
The Scoop @ Stone Gable
The Inspiration Board @ Carolyns Home Work
Talented Tuesdays @ Home Remedies
Wow Us Wednesdays @ Savvy Southern StyleFriday Favorites @ Casa Watkins


Wow, I love this tissue paper technique. Brilliant job, really captures that Sea glass look and the vinyl lettering opens up so many possibilities. Thanks for showing us the technique and your jars are fabulous.
ReplyDeleteThanks so much Pam for your sweet comment!
DeleteThese jars look so cool and beachy...a real summery feel!
ReplyDeleteThey turned out great! I've never used Mod Podge before but there are clearly endless possibilities for applications. It really does look like sea glass, pinning this! -- Sam from DIYJC
ReplyDeleteEvery time I look at this I'm amazed that it's paper!! It looks so fabulous and seemed so simple to do!
ReplyDeletePinning :)
--Brittany
www.diyjustcuz.com
Very nice. Martha Stewart has a glass paint that works better than the Mod Podge if you ever want to try that. I'm with you on the tinted water method. Back in the 60's my mom had glass swans and every few weeks she changed the water and the color.
ReplyDeleteSusan, by the time I found out about the Martha Stewart glass paint, I did not have enough time to order it. Wow your mom was ahead of her time with the tinted water! lol
DeleteOh my goodness, Lucy, I love the Fau glass ideas, I have wanted to do this for so long. You have some great options and the tissue paper sounds like something I could manage. I have seen where they use paint swirl around in bottles and bake in the oven, that didnt appeal to me, so thank you for this informative tutorial!!
ReplyDeleteNow I would like to invite your to share on my Friday Features Linky Party!!
Hope you have a great weekend!
Karren
#OMHGFF
Thank you for the invite. I have shared at your party!
DeleteI love how your faux sea glass turned out. I have done the food coloring with mod podge and also food coloring with elmer's glue but have not tired the tissue paper. I love that technique and will have to try it out. Your vignette is beautiful. Cathy
ReplyDeleteThanks Cathy! Glad I have inspired you to give it a try. Hope you find some tissue paper that has some flecks in it!
DeleteWow...how pretty! I love the way these turned out! Visiting from Sundays At Home
ReplyDeletexoxo
Lisa @ Fun Money Mom
Thanks Lisa! xo
DeleteWell, I think that they all turned out great! I have used Mod Podge and tissue before and I like the look. I love the writing on the bottles! Thanks for sharing with SYC.
ReplyDeletehugs,
Jann
Thanks Jan, always happy to link up to your party!
DeleteLucy, what beautiful results with your project! You caught my eye on Dwellings link party, and I just wanted you to know I love it all.
ReplyDeleteRita C at Panoply
Rita, you are so sweet! Thanks for stopping by! :o)
DeleteBrilliant and gorgeous!! I can't wait to make some of these with my girls; they love to craft. ;)
ReplyDeleteThanks so much Lynn. You are blessed to have daughters who like to craft with you! I hope you enjoy making them!
DeleteI love how you showed three different ways to create "sea glass". I once tried to use sea glass paint, and it didn't turn out anywhere near as great as yours. Plus, you created yours with stuff I already have laying around the house - I definitely need to try the tissue paper technique. I actually see a glass on my counter right that would work perfectly... Thanks for sharing with us at Dream. Create. Inspire. Link. Hope to see you back tonight!
ReplyDeleteI just love how your projects turned out! What a great idea to use vinyl lettering vs etching the glass. Pinning this so I can try out your method, thanks!
ReplyDeleteStunning results Lucy. Love how these easy to do projects turned out and I appreciate you sharing them at Shabbilicious Friday. I'm delighted to be featuring this project at tomorrow's party.
ReplyDeleteMy favorite is the food coloring! so pretty. Catching you this week!
ReplyDeletegail
I'd love to try one of these techniques...love the look! :)
ReplyDeleteThese are all so beautiful!! Thanks for sharing the details on all these techniques. My favorite part is the vinyl lettering, it adds such a great touch!
ReplyDeletelove these.
ReplyDeleteLove them!
ReplyDeleteThanks so much for sharing at AMAZE ME MONDAY!
Blessings,
Cindy
So gorgeous....
ReplyDeleteSharing the love by featuring Links to this FABULOUS post over at Mia Bella Passions Create, Inspire, Love...http://miabellapassion.blogspot.co.nz/2015/07/create-inspire-love-5.html
Oh my gosh, I love how these turned out! I saw that same hand painted bottle and thought it was just gorgeous, and I love what you did with the inspiration!
ReplyDeleteThanks Jessi and ladies for stopping by and leaving such encouraging comments!
DeleteSo many great ideas! I love sea glass but have yet to actually find any on my beach trips - now I can make my own! Thanks so much for sharing with us at Talented Tuesdays!
ReplyDeleteOMGosh! I am in love with the square decanter one!! Will definitely have to make a few. Tks so much for sharing.
ReplyDeleteWhat beautiful ideas! I love sea glass & love the look you achieved. I am stopping on my way home to buy food coloring!! It looks just lovely. Thanks for sharing at Friday Favorites & we hope you will join us again! Michelle OurCraftyMom
ReplyDeleteGood morning! I just wanted to let you know that I will be featuring this great project at Friday Favorites which will be live Thursday evening. Thank you so much for sharing with us! Michelle OurCraftyMom
ReplyDeleteThese are all beautiful! Thanks so much for linking up. I'm also going to feature you at Friday Favorites! :)
ReplyDeleteThis comment has been removed by the author.
ReplyDeleteThank you very much dear for this step by step tutorial for summer centerpieces. Those Faux Sea Glasses are out of this world. I would love to make them for my son’s birthday party. Could you suggest some recommendations for the inexpensive event space San Francisco?
ReplyDeleteI recently painted some furniture pieces, using latex flat paint, mixed with plaster of Paris and water. I had two bottles and poured the aqua paint inside them, drained and let them dry. I sprayed one with a frosted glaze, left the other one plain. I decorated the neck of each with a contrasting ribbon.
ReplyDeleteGreat tutorials. For some reason, I'm drawn to the "faux" one but the others are probably more fun to create! Visiting from Get Your DIY On.
ReplyDeleteI just love these, Lucy! I really want to try a couple of them!! XO
ReplyDeleteFON PERDE MODELLERİ
ReplyDeletenumara onay
mobil ödeme bozdurma
Nft Nasil Alınır
ankara evden eve nakliyat
Trafik Sigortasi
dedektör
web sitesi kurma
ASK ROMANLARİ
smm panel
ReplyDeleteSmm Panel
iş ilanları
İNSTAGRAM TAKİPÇİ SATIN AL
hirdavatciburada.com
beyazesyateknikservisi.com.tr
Servis
tiktok para hilesi
dijital kartvizit
ReplyDeletereferans kimliği nedir
binance referans kodu
referans kimliği nedir
bitcoin nasıl alınır
resimli magnet
D3R73
beşiktaş
ReplyDeleteizmit
mersin
uşak
fatih
242M
yurtdışı kargo
ReplyDeleteresimli magnet
instagram takipçi satın al
yurtdışı kargo
sms onay
dijital kartvizit
dijital kartvizit
https://nobetci-eczane.org/
CAD
yurtdışı kargo
ReplyDeleteresimli magnet
instagram takipçi satın al
yurtdışı kargo
sms onay
dijital kartvizit
dijital kartvizit
https://nobetci-eczane.org/
WH431R
yurtdışı kargo
ReplyDeleteresimli magnet
instagram takipçi satın al
yurtdışı kargo
sms onay
dijital kartvizit
dijital kartvizit
https://nobetci-eczane.org/
JF1QH
silivri çatı ustası
ReplyDeletefal baktır
indirmeden oynanan oyunlar
ünye veteriner
https://yoltransfer.com.tr/
FENDDM
https://bayanlarsitesi.com/
ReplyDeleteKayseri
Sinop
Kilis
Hakkari
MP3SC
istanbul evden eve nakliyat
ReplyDeletebalıkesir evden eve nakliyat
şırnak evden eve nakliyat
kocaeli evden eve nakliyat
bayburt evden eve nakliyat
DKUUBV
adana evden eve nakliyat
ReplyDeletebolu evden eve nakliyat
diyarbakır evden eve nakliyat
sinop evden eve nakliyat
kilis evden eve nakliyat
O7Z0F
C477B
ReplyDeleteUrfa Evden Eve Nakliyat
Çerkezköy Cam Balkon
Erzurum Evden Eve Nakliyat
Tekirdağ Parke Ustası
Çerkezköy Fayans Ustası
013D9
ReplyDeleteKars Lojistik
Sakarya Şehirler Arası Nakliyat
Karaman Şehirler Arası Nakliyat
Eryaman Alkollü Mekanlar
Tekirdağ Evden Eve Nakliyat
Batıkent Parke Ustası
Sinop Şehirler Arası Nakliyat
Eskişehir Şehirler Arası Nakliyat
Çankırı Şehir İçi Nakliyat
C2AF3
ReplyDeleteKastamonu Şehirler Arası Nakliyat
Batman Evden Eve Nakliyat
Tekirdağ Parke Ustası
Maraş Lojistik
Ünye Kurtarıcı
Sincan Boya Ustası
Aksaray Parça Eşya Taşıma
Kastamonu Parça Eşya Taşıma
Elazığ Şehirler Arası Nakliyat
cfimi.com
ReplyDeletekırklareli
zonguldak
kilis
çankırı
YX1MF
8C3F4
ReplyDeleteKonya Evden Eve Nakliyat
Arg Coin Hangi Borsada
Yalova Parça Eşya Taşıma
Çerkezköy Mutfak Dolabı
Casper Coin Hangi Borsada
Çerkezköy Evden Eve Nakliyat
Iğdır Şehirler Arası Nakliyat
Kalıcı Makyaj
Karaman Parça Eşya Taşıma
D2688
ReplyDeleteSakarya Kadınlarla Rastgele Sohbet
maraş görüntülü sohbet kadınlarla
Antalya Rastgele Sohbet Siteleri
Urfa Kızlarla Rastgele Sohbet
kars parasız sohbet siteleri
Bursa Canli Sohbet Bedava
Edirne Bedava Görüntülü Sohbet
kocaeli mobil sohbet
edirne rastgele sohbet uygulaması
FB340
ReplyDeleteığdır canlı sohbet odaları
parasız görüntülü sohbet uygulamaları
niğde telefonda görüntülü sohbet
ısparta telefonda kadınlarla sohbet
Afyon Canlı Görüntülü Sohbet Uygulamaları
Ardahan Canlı Sohbet Odaları
Nevşehir Parasız Görüntülü Sohbet Uygulamaları
görüntülü sohbet siteleri ücretsiz
osmaniye görüntülü sohbet yabancı
CE4D5
ReplyDeleteAdıyaman Kadınlarla Rastgele Sohbet
canlı görüntülü sohbet odaları
bilecik canlı görüntülü sohbet odaları
van canli sohbet chat
Karaman Görüntülü Sohbet Siteleri
Trabzon En İyi Sesli Sohbet Uygulamaları
Kırıkkale Ücretsiz Sohbet Siteleri
uşak sesli sohbet mobil
aksaray görüntülü sohbet
373FD
ReplyDeletemersin telefonda görüntülü sohbet
Izmir Yabancı Sohbet
düzce mobil sohbet
antep ücretsiz sohbet odaları
erzurum canli goruntulu sohbet siteleri
sesli sohbet
Kilis Canli Sohbet Chat
Sakarya Ücretsiz Sohbet Odaları
görüntülü sohbet odaları
مكافحة الحشرات بالاحساء rvGhcbKEXP
ReplyDelete85AAAFE930
ReplyDeleteinstagram bayan takipçi
7AF17533BA
ReplyDeletetürk takipçi instagram
youtube beğeni satın al
takipçi paketi
türk takipçi
türk takipçi
966FD0A957
ReplyDeletetürkiye'de en çok oynanan mmorpg oyunlar
sms onay go
mobil ödeme bozdurma
en iyi takipçi satın alma sitesi
-