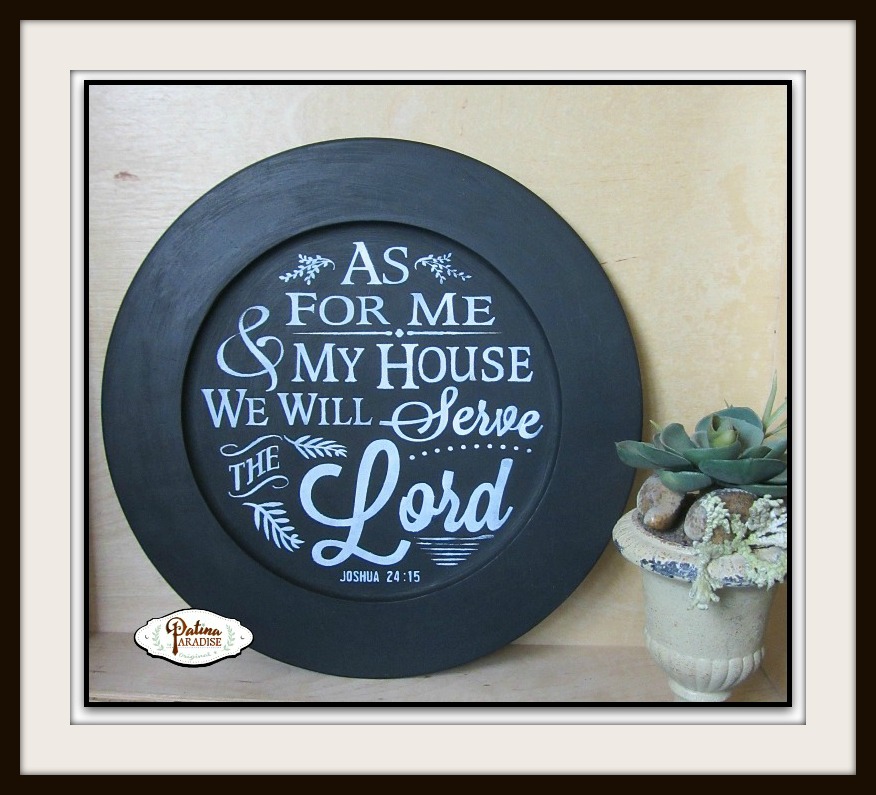
I started out with a wood charger that I thrifted… (I found several actually) and as you can see from the one on the left, it was in desperate need of some touching up. One coat of "Waverly" black chalk paint bought at Walmart was all it needed to freshen it up. Now the base for the faux chalk board writing was ready...
I used dollar store shelf liner to cut out the stencil with my Silhouette Cameo machine and then transparent shelf liner to transfer it to the plate.
The lip on the charger made it a little difficult to adhere and keep down. But I simply started at one end and held it down as I went along.
Using some inexpensive white acrylic craft paint I used a makeup sponge and small lid to dab the paint on and off onto the stencil to get the look of chalkboard writing.
Try to have very little on the end of the sponge and dab lightly until all of the lettering is filled.
Remove the stencil as soon as you are done being careful not to smudge the paint. I used a black sharpie to fill in the small spots that filled in when I stencilled.
Once dried you could probably use some fine grit sand paper to soften the edges and make the lettering look even more like sandpaper. Being the last minute worker that I am, daylight was a burning so I didn't get the opportunity to do so. Don't forget to seal it. I will probably use a matte varnish by the same "Waverly" brand.
I have a few more to finish for my upcoming craft show. I hope I sell as many as I make.
Make sure to click on the links below to check out what my creative blogging friends have come up with for this month's challenge...
Blessings,
Lucy.
Lucy.
Partying at these locations…
MONDAYS
Something to Talk About @ Spain Hill Farm
Inspire Me Monday @ Sand and Sisal
The Scoop @ Stone Gable
Before and After Linkup @ Thrifty Decor Chick
TUESDAYS
SITS Sharefest @ The SITS Girls
Moonlight and Mason Jars @ Cherished Bliss
Inspire Me Tuesday @ A Stroll Thru LifeWow Us Wednesdays @ Savvy Southern Style
Vintage Inspiration Party @ My Salvaged Treasures
Dream Create Inspire @ Refresh Living
Swing into Spring @ DIY by Design
What's It Wednesdays @ Ivy And Elephants
Your Decor and More @ Iris Nacole
WEDNESDAYS
Homemade and Handcrafted @ Redo It Yourself
Creative Spark @ Two Purple Couches
Welcome Home Wednesdays @ Suburban Simplicity
Share Your Cup Thursday @ Have a Daily Cup of Mrs. Olson
Home and Garden Thursday @ A Delightsome Life
Share Your Style @ The Vintage Nest
Treasure Hunt Thursday @ From My Front Porch to Yours
THURSDAYS
Brag Worthy Thursday @ Bless'er House
Think and Make Thursdays @ Little Red Brick House
The Creative Circle @ Up to Date Interiors
Vintage Charm @ Charm Bracelet Diva
Shabbilicous Fridays @ The Shabby Art Boutique
Feathered Nest Fridays @ French Country Cottage
Simple and Sweet Fridays @ Rooted In Thyme
The Inspiration Gallery @ craftberry bush
Creativity Unleashed @ Practically Functional
Show and Tell Friday @ My Romantic Home
the weekend retreat @ AKA Design
Inspiration Friday @ The Painted Drawer
FRIDAYS
A morning Cup of Joe @ The Cottage Market
Upcycled Link Party @ Funky Junk Interiors
SATURDAYS
Saturday Sparks @ Pieced Pastimes
Share it One More Time @ One More Time Events
DIY Sunday Showcase @ The Interior Frugalista
Sundays at Home @ Love of Home
SUNDAYS
Silver Pennies Sundays @ Finding Silver Pennies
Inspired By You @ Reinvented
Inspiration Monday @ What Meegan Makes
Amaze Me Mondays @ Dwellings


Lucy this came out really nice.
ReplyDeleteFaux Chalk!!! I love it.
ReplyDeleteSo elegant. And I never would have guessed how you started out with the materials. Love it, Lucy!
ReplyDeleteThis is one of my favorite pieces you've ever made. The use of a charger is genius. And the paint looks just like chalk. As always...you're amazing.
ReplyDeleteLucy, I love the tutorial....I have a cricut but have not been investing the time to see what all I can do with a machine like that!!! Super project....
ReplyDeleteI love the design!! This is wonderful. You used the method I love the best for making my signs. I super duper love this!! ;)
ReplyDeleteSo pretty Lucy:) I love chalkboard art!
ReplyDeleteSuper cute!! And a brilliant idea for someone like me who doesn't like her hand lettering!!! 😉 now I just need a silhouette...😄
ReplyDeleteLove this! And enjoying all the other creative ideas too! Thanks for sharing at Brag About It! Pinned to share.
ReplyDelete~Laurie
What a fun project, Lucy! I love the chalkboard look and the saying. Great job!
ReplyDeleteThank you for sharing this week at Brag About It link party on VMG206 (Mondays at Midnight).
~ Megin of VMG206
Love love love this, Lucy! Thanks for sharing! XO
ReplyDelete